Webdav Server
From MMVLWiki
MMVL has a webdav server for exchanging files. The files will be accessible by MMVL and its partners only. Please create directories, if you want to upload a bunch of files.
| Table of contents |
Webdav Server
If you are a MMVL partner and you don't have access, please create a password file and send it to me. You can create the password file as follows
htpasswd -bc password.txt myusername mypassword
htpasswd is part of the apache2-utils package. Windows users need to download htpasswd.exe (http://www.intrex.net/techsupp/htpasswd.exe) instead and run it from the command line (cmd).
There are different methods to access the webdav-server:
Microsoft Internet Explorer
 |  |  |  |
You can use Microsoft Internet Explorer 5.0 or higher (see here (http://www.cyberteams.com/edu-ctr/wsdpro/tutorial/WSDT_WebDAV.html) for troubleshooting and different Windows versions). Writing doesn't work with Windows 2000 and some versions of Windows XP however because they refuse to connect to a server which does not implement the Microsoft Frontpage Server extension.
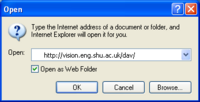
- Open Microsoft Internet Explorer (MSIE)
- From the MSIE Menu, select File => Open >
- Type in the fully-qualified URL http://vision.eng.shu.ac.uk/dav/
- Select the Open as Web Folder checkbox
- Click the OK button
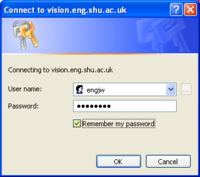
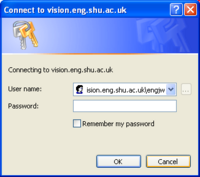
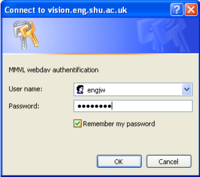
- A dialog box for http authentification opens. Enter your user name and password.
- Another dialog box will query your user name and password for Microsoft Frontpage Server Extension (press Escape).
- A third dialog box for webdav authentification opens. Enter your user name and password again.
- Now the file-browser should display the webdav-folder. You can copy files with drag-and-drop.
Note that Internet Explorer cannot rename webdav folders for some reason. You have to create directories locally (f.e. in C:\Temp) and then upload them with drag-and-drop.
Firefox

Firefox currently cannot write to webdav. However you can read from webdav by simply pointing Firefox to the following URL and entering your username and password: http://vision.eng.shu.ac.uk/dav/
DAVExplorer
If you have to use Microsoft Windows and opening web folders doesn't work with Internet Explorer, you can download and run DAVExplorer instead.
Install
- Download and install Java (http://www.java.com/en/download/manual.jsp), if you don't have it already.
- Download and unpack the DAV Explorer (http://www.davexplorer.org/).
Run
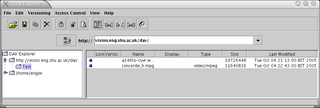
- Double-click the file DAVExplorer.jar (or type java -jar DAVExplorer.jar on the command-line). The program should start now (see screenshot).
- Type vision.eng.shu.ac.uk/dav/ in the URL-line and press the connect logo to the left of the input field.
- A dialog box will query your user name and password.
- Click on http://vision.eng.shu.ac.uk/dav in the tree view.
- You can upload or download files by selecting File => Write File or File => Get File.
Konqueror
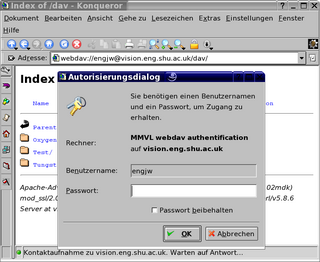
Under Linux you can use konqueror and its webdav-ioslave
- Type in the fully qualified URL webdav://vision.eng.shu.ac.uk/dav/ or webdav://myusername@vision.eng.shu.ac.uk/dav/ in the location input field and press return.
- A dialog-box will query your user name and password.
- You can copy files with drag-and-drop.
Davfs2
Using davfs2 (http://dav.sourceforge.net/) it is possible to simply mount the webdav-server as a filesystem under Linux. To be able to mount the davfs2 file system as user, you need to add the following line to '/etc/fstab' (replacing myuser and mygroup with the desired local user and group for the virtual file system)
http://vision.eng.shu.ac.uk/dav/ /media/dav davfs rw,user,uid=myuser,gid=mygroup,noauto 0 0
See Also
External Links
- List of Webdav clients (http://www.webdav.org/projects/)

